|
|
(JavaScript) Sign PDF with Timestamp from TSA (Timestamp Server Authority)
This example demonstrates how to a sign a PDF that is both long-term validation (LTV) enabled and includes a validating timestamp from a TSA (Timestamp Server Authority).Note: This example requires Chilkat v9.5.0.85 or greater.
var success = false;
// This example requires the Chilkat API to have been previously unlocked.
// See Global Unlock Sample for sample code.
var pdf = new CkPdf();
// Load a PDF to be signed.
// The "hello.pdf" is available at https://chilkatsoft.com/hello.pdf
success = pdf.LoadFile("qa_data/pdf/hello.pdf");
if (success == false) {
console.log(pdf.LastErrorText);
return;
}
// Options for signing are specified in JSON.
var json = new CkJsonObject();
// In most cases, the signingCertificateV2 and signingTime attributes are required.
json.UpdateInt("signingCertificateV2",1);
json.UpdateInt("signingTime",1);
// Tell Chilkat to create an LTV-enabled (long term validation) signature.
// See PDF Long-Term Validation (LTV) Signature Example for more detailed comments about "ltvOcsp".
json.UpdateBool("ltvOcsp",true);
// Tell Chilkat to request a timestamp from a TSA server and include the timestamp token (1.2.840.113549.1.9.16.2.14)
// in the CMS signature's authentication attributes
json.UpdateBool("timestampToken.enabled",true);
// In this example, we'll use a free TSA server (timestamp.digicert.com), but you may want to use your own timestamp authority server.
json.UpdateString("timestampToken.tsaUrl","http://timestamp.digicert.com");
// If the timestamp server requires a username/password, do the following. Otherwise omit the following few lines of code.
json.UpdateString("timestampToken.tsaUsername","the_tsa_username");
json.UpdateString("timestampToken.tsaPassword","the_tsa_password");
// When requesting the timestamp token, ask the server to include its certificate in the timestamp token response.
// This allows for the timestamp server's certificate to be included in the LTV validation (i.e. if the timestamp server
// has an OCSP URL, then Chilkat will also do the OCSP request for the timestamp server's certificate.)
json.UpdateBool("timestampToken.requestTsaCert",true);
// Define the appearance of the signature.
json.UpdateInt("page",1);
json.UpdateString("appearance.y","top");
json.UpdateString("appearance.x","left");
json.UpdateString("appearance.fontScale","10.0");
json.UpdateString("appearance.text[0]","Digitally signed by: cert_cn");
json.UpdateString("appearance.text[1]","current_dt");
json.UpdateString("appearance.text[2]","This is an LTV-enabled signature with a TSA timestamp.");
// Load the signing certificate. (Use your own certificate.)
var cert = new CkCert();
success = cert.LoadPfxFile("qa_data/pfx/myPdfSigningCert.pfx","pfxPassword");
if (success == false) {
console.log(cert.LastErrorText);
return;
}
// Tell the pdf object to use the certificate for signing.
success = pdf.SetSigningCert(cert);
if (success == false) {
console.log(pdf.LastErrorText);
return;
}
success = pdf.SignPdf(json,"qa_output/hello_ltv_signed_with_timestamp.pdf");
if (success == false) {
console.log(pdf.LastErrorText);
return;
}
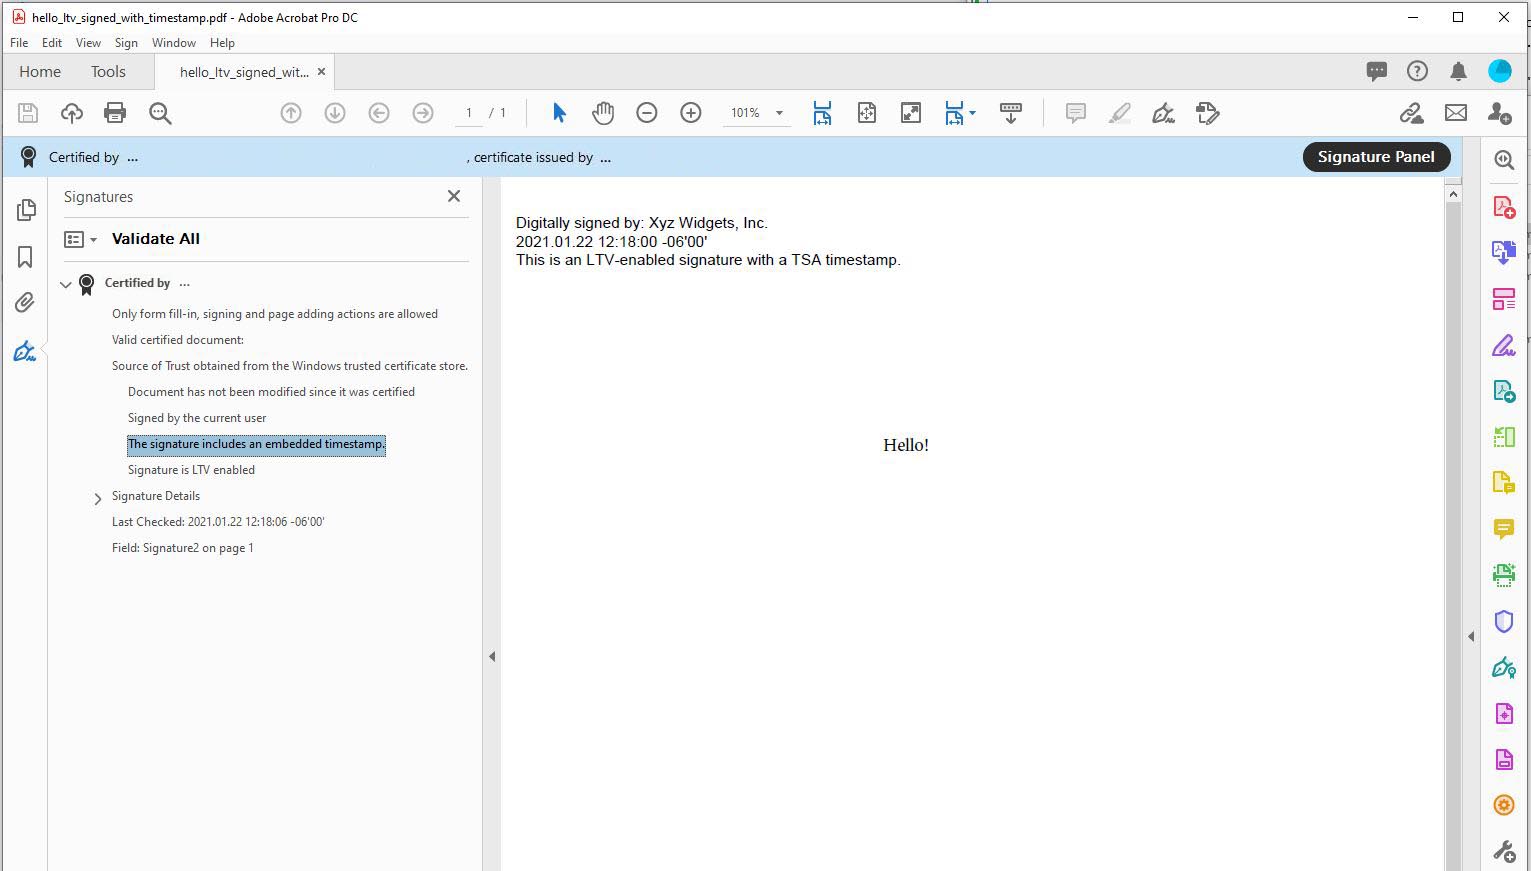
console.log("The PDF has been successfully cryptographically signed with TSA timestamp and long-term validation.");
// If you open the Signature Panel in Adobe Acrobat, it will indicate that the signature is LTV enabled
// and contains an embedded timestamp:
|
